

Food Backdrop Setup Guide: Elevate Your Food Photography
TL;DR:
- Backdrops significantly influence food photography by setting mood, controlling contrast, and reducing distractions.
- Choosing versatile, matte surfaces like vinyl, wood, or marble, and matching textures to the dish enhances image impact.
- Proper setup, including lighting and secure placement, is essential for achieving professional, scroll-stopping photos.
Your food looks incredible in person, but something goes flat the moment you shoot it. The backdrop is almost always the culprit. A distracting, low-contrast, or poorly lit background pulls attention away from the dish and makes even beautifully plated food look amateur. The good news is that fixing this doesn’t require a full studio renovation. With the right surfaces, a smart setup approach, and a clear understanding of how backdrops interact with food, you can produce images that feel polished, intentional, and genuinely scroll-stopping. This guide walks you through every step, from choosing materials to troubleshooting common mistakes.
Table of Contents
- Essential tools and materials for a food backdrop setup
- Step-by-step: Setting up your food photography backdrop
- Choosing the right backdrop for different foods and moods
- DIY and creative alternatives for budget setups
- Common mistakes, troubleshooting, and expert tips for perfect backdrops
- Our perspective: Why mastering backdrops transforms your food shots
- Ready to elevate your food photography? Get quality backdrops now
- Frequently asked questions
Key Takeaways
| Point | Details |
|---|---|
| Backdrops matter | A well-chosen backdrop instantly elevates food styling and product photos. |
| Matte, neutral surfaces are best | Choose non-glossy, textured boards to keep attention on your dishes. |
| Setup technique impacts results | Proper positioning and light diffusion prevent glare and harsh shadows. |
| DIY is budget friendly | Affordable, creative backdrops are easy to build for unique looks. |
| Expert tips save time | Learn and apply pro workflow hacks for consistent, high-quality shots. |
Essential tools and materials for a food backdrop setup
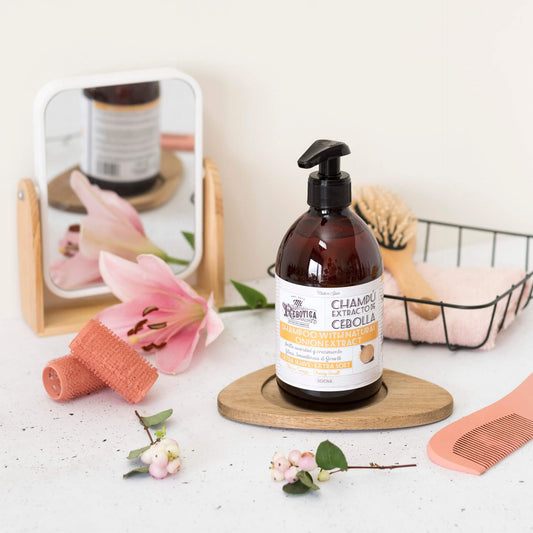
Now that you know why backdrops matter, let’s see what you’ll need to assemble a reliable setup. A strong backdrop kit doesn’t have to be expensive, but it does need to be thoughtful. As neutral textured surfaces like wood, marble, and vinyl boards form the foundation of most professional food photography setups, starting with a few well-chosen options gives you real flexibility across different shoot styles.
Here’s a quick breakdown of the most common backdrop types and their best use cases:
| Backdrop type | Best for | Key benefit |
|---|---|---|
| Matte vinyl | All-purpose food shoots | Easy to clean, no glare |
| Wood grain boards | Rustic, cozy dishes | Warm texture, depth |
| Marble surface | Elegant plating | Sophisticated feel |
| Painted foam core | Budget flat lays | Lightweight, customizable |
Beyond the surfaces themselves, you’ll also need a few supporting tools:
- Clamps and L-brackets to hold vertical backdrops in place
- Foam core boards for DIY surfaces or as bounce cards for light
- A sturdy table at a comfortable shooting height
- Cleaning supplies like a damp cloth and mild spray for vinyl care
- Gaffer tape to secure edges without damaging surfaces
For food photography background tips that go deeper into surface selection, it helps to think in terms of mood first, then material. Explore backdrop ideas for pros to see how experienced photographers mix and match surfaces across different shoot types.
Pro Tip: Invest in 3 to 5 versatile boards that cover light, dark, wood, and stone tones. That small collection will handle the vast majority of food photography scenarios without constant shopping.
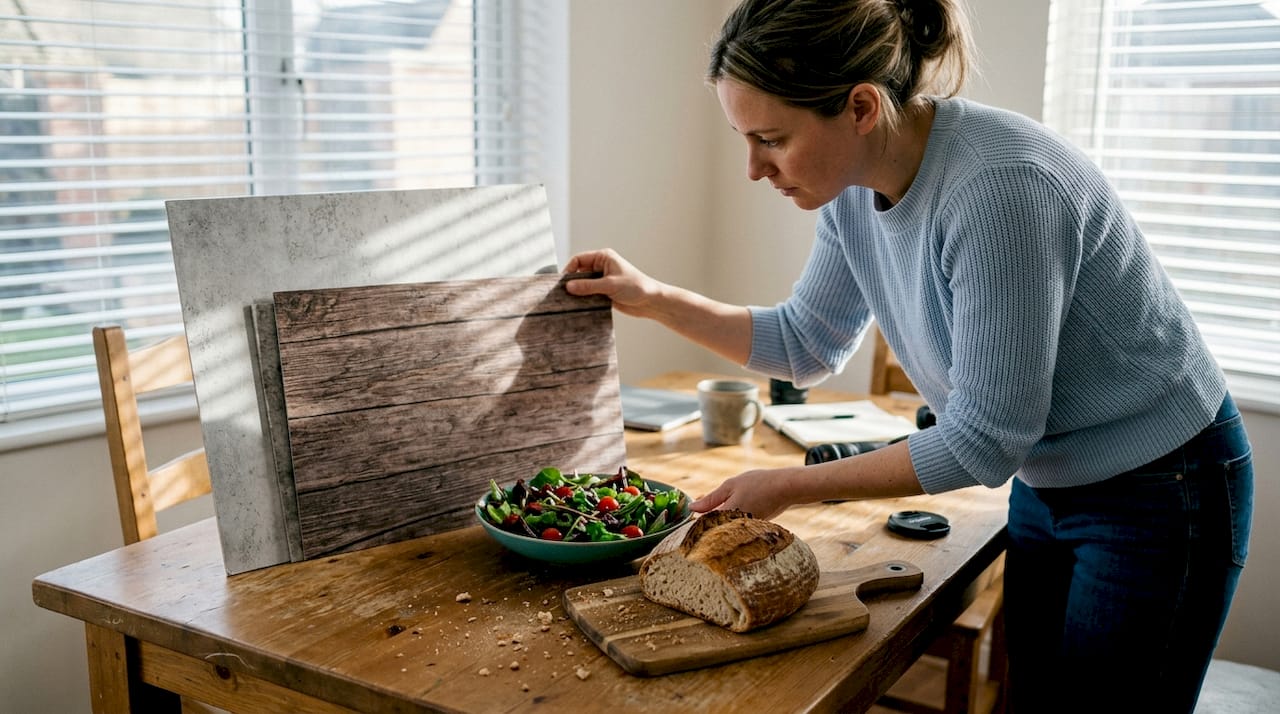
Step-by-step: Setting up your food photography backdrop
With your essentials on hand, it’s time to arrange the backdrop for the best results. Setup style depends on your shooting angle, and getting this right from the start saves a lot of frustration later.
The two most common configurations are the flat lay and the L-shaped setup. Flat lay means your backdrop lies horizontally on a table and you shoot straight down. The L-shaped setup uses a vertical backdrop behind the food and a horizontal surface underneath, creating depth for angled or eye-level shots.
Here’s a simple step-by-step process for both:
- Choose your angle first. Decide whether you’re shooting overhead (flat lay) or at a 45-degree angle before placing anything.
- Position the backdrop. For flat lay, lay the board flat on your table. For L-shaped, secure the vertical panel to a wall or use a backdrop stand with clamps.
- Check for glare. As positioning backdrops with matte finishes and wipeable materials like vinyl prevents reflections and makes cleanup simple, always test your surface under your shoot lighting before placing food.
- Set your light source. Place natural or artificial light at a 45-degree angle to the side of your setup. Avoid placing it directly above for most shots.
- Do a test shot with a stand-in dish. Use a plate or prop food item to check shadows, highlights, and backdrop visibility before the real shoot begins.
- Secure everything. Use clamps or gaffer tape to prevent shifting mid-shoot.
| Setup type | Best angle | Backdrop size needed |
|---|---|---|
| Flat lay | 90° overhead | 2x2 ft minimum |
| L-shaped | 30° to 60° | 24x36 inches or larger |
| Eye-level | 0° to 15° | Large panel, 30x40 inches+ |
For more on elevating visual impact through smart setup choices, and practical advice on styling food with durable backdrops, these resources are worth bookmarking.
Pro Tip: Always use a stand-in dish during your lighting test. Real food wilts, melts, or dries out fast. Save it for when the setup is already dialed in.
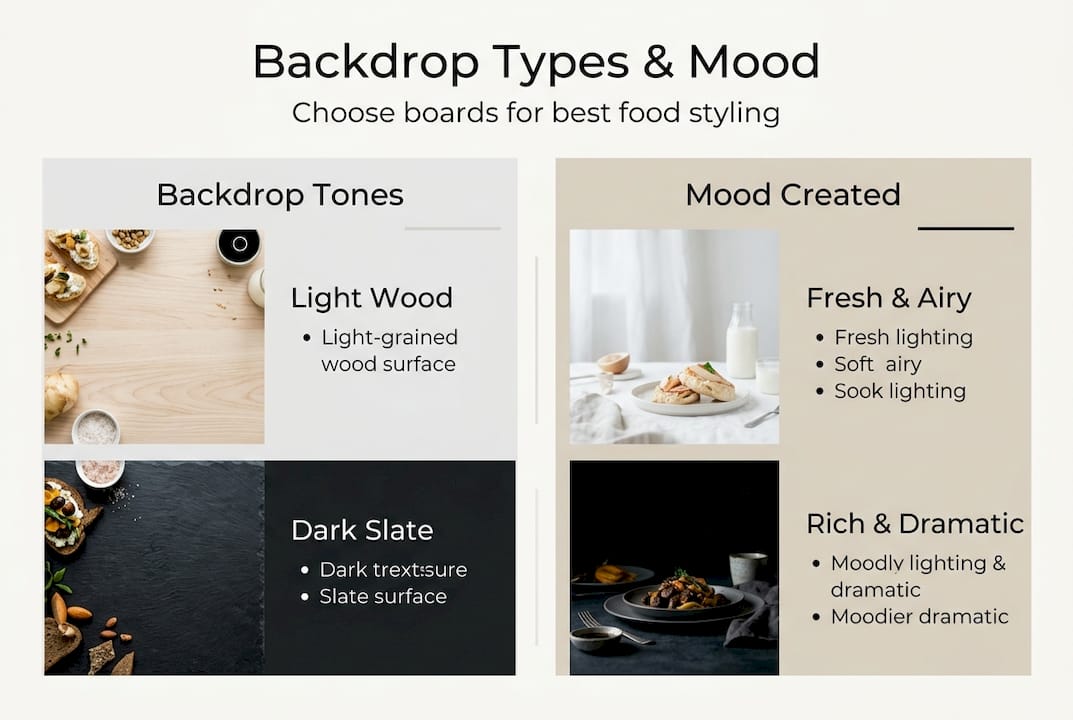
Choosing the right backdrop for different foods and moods
Once your backdrop is stable, maximize its effect by aligning it with your food’s style and mood. This is where the real creative decisions happen, and where many photographers leave impact on the table.
Backdrop choice influences depth and mood: light tones create an airy, fresh feel, while dark surfaces add drama and richness. The key is testing your backdrop against the food’s own color palette before committing to a full shoot.
Here’s a quick comparison to guide your decisions:
| Food type | Recommended backdrop | Mood created |
|---|---|---|
| Fresh salads, pastries | Light marble or white wood | Clean, bright, airy |
| Steaks, stews, dark chocolate | Dark slate or charcoal wood | Rich, dramatic, bold |
| Pasta, pizza, comfort food | Warm wood grain | Cozy, rustic, inviting |
| Sushi, fine dining plates | Cool gray marble | Elegant, minimal |
Color theory plays a real role here. Complementary colors (those opposite each other on the color wheel) create visual tension that makes food pop. A bright orange dish on a cool blue-gray surface, for example, draws the eye immediately. Expert composition tips reinforce that matching backdrop mood to the food story, such as rustic wood for cozy dishes and marble for elegant ones, while avoiding busy patterns or glossy surfaces that cause reflections, is what separates good shots from great ones.
A few practical rules to follow:
- Avoid busy patterns. They compete with the food for attention.
- Glossy surfaces cause reflections. Stick to matte finishes whenever possible.
- Neutral backdrops enhance visual vibrancy by letting the food’s natural color stand out.
- Match texture to the dish’s personality. Rough wood suits hearty food; smooth marble suits refined plates.
For more creative backdrop setups and a deeper look at backdrop impact on visuals, these guides offer strong visual references.
DIY and creative alternatives for budget setups
If you need flexibility or want to experiment on a budget, consider these creative solutions. You don’t need to spend hundreds of dollars to get great results. Some of the most effective backdrops cost under $15 and can be made in an afternoon.
DIY options like crumpled parchment paper for rustic texture, floor tiles, foam boards with contact paper, or painted plywood offer affordable custom backdrops that cost between $3 and $15 each.
Here’s a simple process for building your own textured board:
- Start with a foam core or plywood base. Foam core is lighter and easier to handle. Plywood is more durable.
- Apply contact paper or removable wallpaper. Choose a marble, wood, or linen pattern. Smooth out bubbles carefully.
- Add texture if needed. Lightly sand painted plywood for a worn look, or layer crumpled parchment under contact paper for subtle depth.
- Seal painted boards with a matte sealant spray to protect against spills and moisture.
- Label each board on the back with the color and texture so you can grab the right one quickly during a shoot.
Budget materials that work surprisingly well:
- Parchment paper (crumpled for rustic texture): around $3
- Foam core board (24x36 inches): around $5
- Contact paper (marble or wood grain): $8 to $12 per roll
- Floor tiles (ceramic or stone look): $1 to $3 each
- Removable wallpaper panels: $10 to $15 per sheet
For more backdrop styling ideas and lifestyle backdrop ideas that work across different content styles, these posts are a great starting point.
Pro Tip: Floor tiles are one of the most underrated backdrop tools. They’re rigid, easy to clean, and look incredibly realistic in photos. Pick up a few samples from a home improvement store for free or very cheap.
Common mistakes, troubleshooting, and expert tips for perfect backdrops
To finish strong, let’s prevent easy-to-make errors and polish your workflow with pro strategies. Even experienced photographers make these mistakes, and catching them early saves a lot of reshooting.
The most common issues and their fixes:
- Backdrop is too small. Overhead shots need smaller boards, but side angles require large surfaces to fill the frame properly.
- Clutter in the frame. Keep the surface clean. Props should support the food, not compete with it.
- Direct sunlight causes harsh shadows. Diffuse window light with a sheer curtain or white foam core bounce card.
- Glossy surface reflections. Switch to a matte vinyl or painted board immediately.
- Backdrop shifts mid-shoot. Secure all edges with clamps or gaffer tape before placing food.
“Direct sunlight causes harsh shadows and glare on backdrops. Always diffuse your light source, and keep the surface clutter-free for a clean, professional result.”
One often-overlooked insight: 45-degree angle shots achieve 74.4% accuracy for portion estimation in food images, and using multiple angles improves that to 85.4%. This matters for commercial food clients who need shots that communicate portion size clearly alongside visual appeal.
For a deeper look at product shot essentials and backdrop tips for stunning shoots, these guides cover the technical side in more detail.
Pro Tip: Use a tripod for every shoot. It locks your framing so you can swap dishes, adjust props, and test lighting without losing your composition. This alone cuts editing time significantly.
Our perspective: Why mastering backdrops transforms your food shots
Here’s something most photography content won’t tell you directly: the backdrop does more heavy lifting than your camera body ever will. Photographers obsess over lens sharpness, megapixel counts, and editing presets, but the single biggest visual upgrade in most food photography comes from fixing the surface behind the dish.
A well-chosen backdrop sets the mood before the viewer even registers the food. It controls contrast, supports color, and frames the subject without demanding attention. That’s a lot of work for something people rarely notice when it’s done right.
The photographers who consistently produce strong work aren’t using the most expensive gear. They’re iterating quickly, testing different surfaces under real shoot conditions, and making decisions based on what they see rather than what they planned. Planning matters, but rapid testing matters more.
If you want to understand how backdrops elevate visual impact in practical terms, start by shooting the same dish on three different surfaces. The difference will be immediately obvious. Build from there, and refine your kit over time based on what actually works for your style and your clients.
Ready to elevate your food photography? Get quality backdrops now
If you’re looking to upgrade your workflow with dependable, eye-catching results, here’s your next step. DIY boards are a great starting point, but there’s a clear ceiling to what improvised materials can deliver. When your clients expect consistency, durability, and a polished look across every shoot, professional-grade vinyl backdrops make the difference.
At Instant Backdrops, we specialize in ultra-realistic, stain-resistant vinyl backdrops built specifically for food and product photography. Our surfaces handle oil spills, sauce drips, and close-up scrutiny without fading or warping. Browse our full range and read our food photography background tips to find the right surface for your next shoot. Your food deserves a backdrop that works as hard as you do.
Frequently asked questions
What is the ideal size for a food photography backdrop?
Small boards around 2x2 ft suit overhead flat lay shots, while larger surfaces of 30x40 inches or more are needed to fill the frame for angled or eye-level setups.
How do I avoid glare on my food backdrops?
Choose matte finishes to avoid glare, and diffuse harsh sunlight using a sheer curtain, scrim, or a white foam core bounce card placed between the light source and your backdrop.
Can I create effective backdrops on a budget?
Absolutely. Crumpled parchment, painted plywood, or contact paper applied to foam core boards all produce realistic, affordable backdrops that photograph well and cost between $3 and $15 to make.
What lighting works best with food backdrops?
Soft natural window light is ideal for most food photography because it renders textures realistically. Side or backlighting reveals surface detail and creates natural-looking shadows that add depth to the backdrop.
How do I choose backdrop colors that flatter my dish?
Pick neutral or complementary hues that contrast the food’s dominant color. This creates visual separation between the dish and the surface, making the food look more vibrant and defined.
Recommended
- Food Photography Background Tips for Stunning Visuals – Instant Backdrops
- How to style food photography with durable backdrops – Instant Backdrops
- 7 Creative Examples of Backdrop Setups for Photographers – Instant Backdrops
- Food Photography Backdrop Importance: Impact on Visual Appeal – Instant Backdrops
- Accent lighting guide: Create an impressive space easily – Dekoja.net