


How to style photography backgrounds for pro results
TL;DR:
- Proper lighting and distance are more crucial than backdrop material for professional results.
- Use neutral solid-colored backdrops like white or gray to meet platform requirements and focus on the product.
- Separating the subject from the background with adequate space and separate lighting improves image quality.
A cluttered background or a wrinkled sheet of fabric can quietly ruin an otherwise perfect product shot. You might have great lighting, a beautiful subject, and sharp focus, but if the background is distracting, buyers lose confidence and scroll right past. Background styling is not just about aesthetics. It directly affects whether your images meet platform requirements, build trust with shoppers, and convert browsers into buyers. This guide walks you through the exact materials, setup steps, styling techniques, and troubleshooting fixes you need to create backgrounds that look polished, professional, and platform-ready every single time.
Table of Contents
- Essential tools and materials for styling backgrounds
- Preparing your shooting space for professional backgrounds
- Step-by-step: Styling seamless, fabric, and textured backgrounds
- Troubleshooting common background styling mistakes
- Our perspective: What most guides miss about styling backgrounds
- Take your background styling to the next level
- Frequently asked questions
Key Takeaways
| Point | Details |
|---|---|
| Choose the right material | Seamless paper is best for e-commerce compliance while fabric offers versatility and fewer reflections. |
| Prepare your space | Declutter, light backgrounds evenly, and separate your subject for crisp, professional shots. |
| Use correct styling steps | Curve your background, position subjects and props, and match styling to your target platform. |
| Troubleshoot mistakes early | Watch for shadows, wrinkles, and clutter—fix them on set for easier editing later. |
Essential tools and materials for styling backgrounds
Having recognized the value of well-styled backgrounds, let’s start by gathering the right materials. The good news is that you do not need a massive studio budget. You need the right combination of surfaces, supports, and a few smart props.
Core materials checklist:
- Seamless paper rolls (white, gray, or black)
- Fabric backdrops (muslin, microfiber, or polyester)
- Vinyl or rigid textured surfaces (marble, wood, stone)
- Background support stand or crossbar
- Clamps and clips
- Gaffer tape
- Reflectors and diffusers
- A steamer or wrinkle-release spray for fabric
Each material has a distinct personality. Here is a quick breakdown:
| Material | Best for | Pros | Cons |
|---|---|---|---|
| Seamless paper | E-commerce, product | Clean, cheap, wrinkle-free | Tears easily, single use |
| Fabric (muslin, microfiber) | Portraits, lifestyle | Lightweight, portable, non-reflective | Can wrinkle |
| Vinyl | Food, flat lay, product | Durable, stain-resistant, realistic | Slightly reflective |
| Textured surfaces | Styled, creative | Authentic look, reusable | Heavy, less portable |
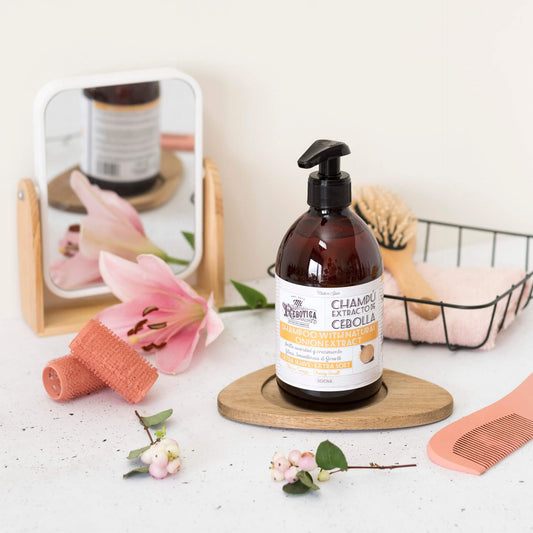
Fabric backdrops made from muslin, microfiber, or polyester are wrinkle-resistant, lightweight, and non-reflective, making them a strong choice for studio use and portrait work. They diffuse light beautifully and pack down small for location shoots.

For e-commerce specifically, color choice matters as much as material. Neutral solid colors like white, gray, or beige keep the focus on the subject and meet platform requirements, including Amazon’s mandatory pure white (#FFFFFF) for main product images. Straying from this can get your listing rejected before a single shopper sees it.
Vinyl surfaces sit in a sweet spot for food and product photographers. You can read more about the vinyl backdrops benefits and why so many creators are switching to them for flat lay work. They handle spills, wipe clean, and print at resolutions that hold up under close-up lenses.
For a broader look at how different surfaces perform across shooting styles, explore the range of background types for photography to match your specific niche.
Props and support gear tips:
- Choose props that complement the product without competing for attention
- Use a sturdy crossbar stand rated for the weight of your backdrop roll
- Keep a lint roller nearby for fabric surfaces
- Gaffer tape beats regular tape for securing paper without tearing it
Preparing your shooting space for professional backgrounds
With your materials in hand, next comes perfecting your physical shooting setup. A great backdrop means nothing if your space introduces shadows, clutter, or uneven light.
Start with a full scan of your background before you place a single product. Scan for distractions like bright spots, visible lines, and clutter. Moving your subject or camera slightly, or opening up your aperture to f/2.8 or wider, can blur out minor imperfections without any retouching.
Setup checklist for your shooting space:
- Remove all non-essential items from the frame
- Tape down paper edges to prevent curling
- Position your main light at a 45-degree angle to the background
- Add a secondary light or reflector to fill shadows
- Check for color spill from colored walls or props
Here is a simple reference for light-to-background positioning:
| Shooting style | Recommended distance (subject to background) | Aperture range |
|---|---|---|
| Clean white product | 3 to 6 feet | f/8 to f/11 |
| Lifestyle flat lay | 1 to 2 feet | f/4 to f/5.6 |
| Portrait or fashion | 5 to 10 feet | f/2.8 to f/4 |
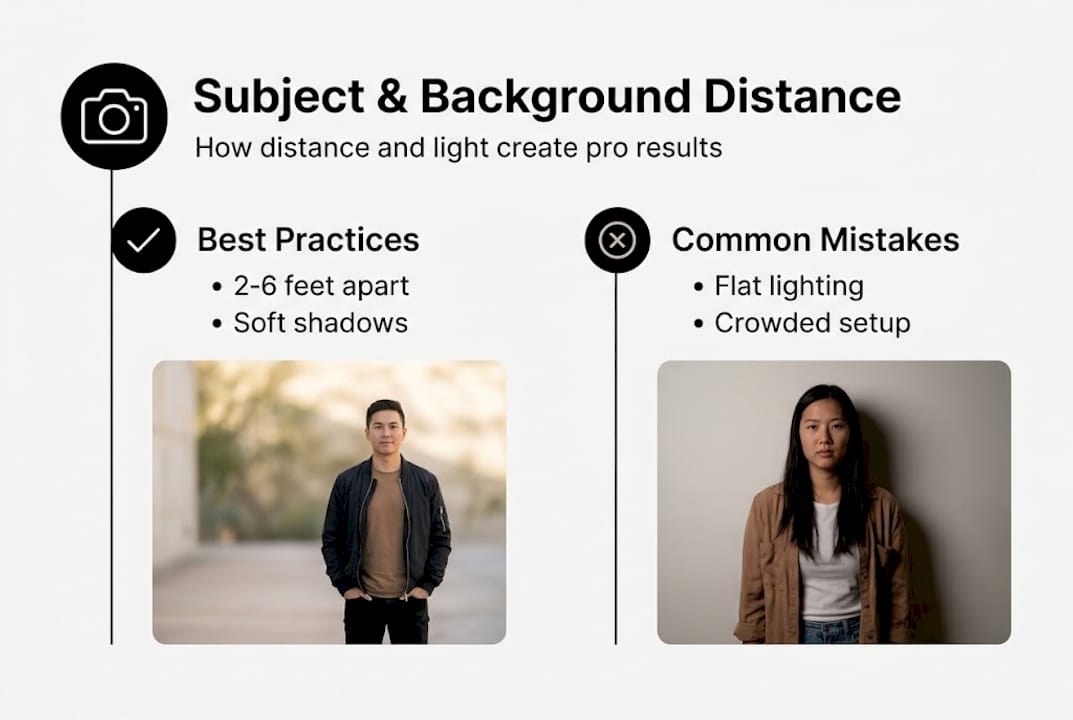
Subject-to-background separation is one of the most underrated tools in your kit. The more distance between your subject and the background, the easier it is to control each independently with light.
Natural light can work well, but it shifts throughout the day. If you rely on a window, shoot at the same time each session and use a diffusion panel to soften harsh direct sun. For consistent results, a pair of continuous LED panels gives you repeatable output every shoot.
Pro Tip: Light your background slightly brighter than your subject (+0.5 to +1 stop) when shooting for a pure white result. This prevents gray shadows from creeping in and keeps your image platform-compliant without heavy post-processing.
For a full walkthrough of setting up your space from scratch, the guide on e-commerce photography basics covers everything from room layout to gear selection.
Step-by-step: Styling seamless, fabric, and textured backgrounds
After prepping your shooting area, it is time to style and install your backgrounds for maximum visual impact. Each background type has its own setup rhythm.
Seamless paper setup:
- Mount your paper roll on a crossbar stand at least 1 foot above your tallest subject
- Unroll enough paper to sweep from the wall down to the floor with a gentle curve (the infinity effect)
- Secure the floor section with gaffer tape so it stays flat
- Position your product 2 to 6 feet away from the paper to avoid shadows and color spill
- Light the background separately with a dedicated backlight or panel
- Check for any footprints or scuffs before each shot and trim the paper if needed
Fabric backdrop setup:
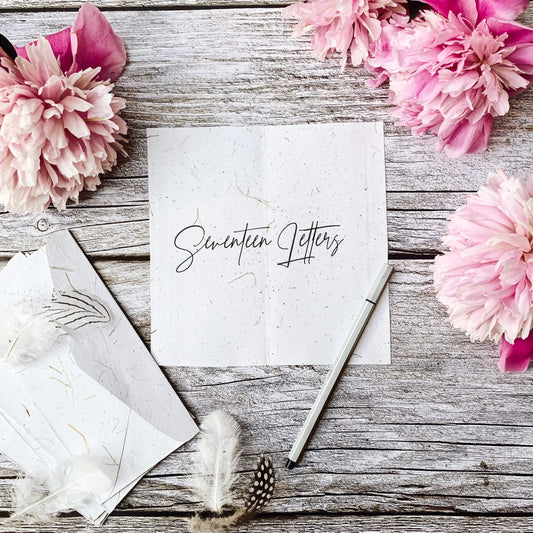
- Steam the fabric before hanging to remove wrinkles
- Hang from a crossbar with even tension across the width
- Let it drape naturally or clip the bottom for a taut look
- Use a reflector to fill any shadows created by folds
Textured surface setup (marble, wood, concrete):
- Lay the surface flat for flat lay or prop it vertically for product shots
- Wipe clean before shooting
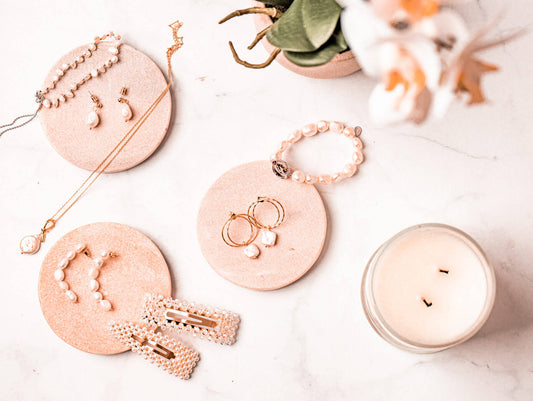
- Arrange contextual props that match your product category. Textured surfaces like marble, wood, and concrete work best when paired with props that feel native to the product world, such as herbs for food or tools for hardware
- Shoot from directly above for flat lay or at a slight angle for depth
Pro Tip: For styled e-commerce shots, keep props to a maximum of three items. More than that and the eye gets lost before it lands on the product.
If you are selling online and need to meet specific platform rules, the guide on e-commerce background requirements breaks down what each major platform expects. For creative shoots with more flexibility, check out these backdrop ideas for creators to spark your next concept.
Troubleshooting common background styling mistakes
Even with good planning, issues can arise. Here is how to troubleshoot like a pro.
Common mistakes and fast fixes:
- Shadows on the background: Move the subject further from the backdrop and add a dedicated background light
- Wrinkles in fabric: Steam before hanging and use tension clips at the bottom
- Color spill from colored walls: Move your setup to the center of the room or hang a neutral gray card nearby
- Visible seams in paper: Overlap sheets by at least 6 inches and shoot at an angle that hides the join
- Shiny hot spots on vinyl: Diffuse your light source with a softbox or shoot at a wider angle to the surface
For subject blur and background separation, distance is your best friend.
“Position your subject far from the background, at least 5 feet, for maximum background blur and cleaner separation between subject and surface.”
If your image fails a platform compliance check, the most common reasons are a non-white background, visible props in the main image slot, or a background that reads as off-white due to shadow. Fix this by overlighting the background slightly and checking your white balance before you shoot rather than correcting in post.
For more creative problem-solving across different shooting environments, the examples in creative backdrop setups show how working photographers handle real-world challenges.
Quick compliance checklist before you submit images:
- Background reads as pure white (#FFFFFF) at 100% zoom
- No visible props, text, or watermarks in the main image
- Product fills at least 85% of the frame
- No heavy vignetting or color grading applied
Our perspective: What most guides miss about styling backgrounds
Most background styling tutorials spend the bulk of their time on material comparisons. Fabric versus paper. Vinyl versus canvas. And while material choice does matter, it is rarely the reason a photo looks unprofessional.
The real culprits are almost always lighting and distance. A cheap seamless paper roll, lit correctly with good subject-to-background separation, will consistently outperform an expensive textured vinyl surface that is poorly lit and crammed too close to the product.
We see this constantly. Photographers invest in premium backdrops and then place their subject two feet away under a single harsh light. The result is flat, shadowy, and nothing like the inspiration images that led them to buy the backdrop in the first place.
True professional results come from treating the background as its own lighting subject. Light it separately. Give it space. Then choose your material. That order matters more than any product spec.
For sellers specifically, understanding professional e-commerce backgrounds is about more than aesthetics. It is about building a repeatable, compliant workflow that saves you time on every shoot.
Take your background styling to the next level
Ready to transform your photos? The right backdrop makes every other element of your setup work harder. Whether you shoot food, jewelry, fashion, or lifestyle content, investing in high-quality backgrounds gives you consistent, stunning results without the guesswork.
At Instant Backdrops, you will find a curated collection of vinyl backdrops built for exactly this kind of work. Every surface is ultra-realistic, stain-resistant, and printed at high resolution so close-up shots stay sharp. From marble and wood to stone and decorative walls, there is a backdrop ready for your next shoot. Browse the full collection and find the surfaces that let your products truly shine.
Frequently asked questions
What background color is best for product photography?
White or light gray works best for most product photography. Amazon requires pure white (#FFFFFF) backgrounds for all main product listing images.
How do I reduce background shadows in my photos?
Keep your product 2 to 6 feet from the backdrop and light the background separately. Overlight the background by +0.5 to +1 stop relative to your subject to eliminate shadow creep.
Are textured backgrounds suitable for e-commerce photos?
Textured backgrounds work well for styled lifestyle shots, but most platforms require a plain white background for primary product images. Styled lifestyle images can generate 15 to 40% higher conversion rates when used in secondary image slots.
Which is better: fabric or vinyl backdrops?
Fabric absorbs light and reduces glare, making it ideal for portraits and studio work. Vinyl is more durable but slightly reflective, which makes it better suited for flat lay and food photography where texture and realism matter.
How far should my subject be from the background?
Place your subject at least 5 feet from the background and use a wide aperture to maximize blur. Greater subject distance gives you cleaner separation and more control over background exposure.
Recommended
- Master the role of backgrounds in photography: boost sales – Instant Backdrops
- Food Photography Background Tips for Stunning Visuals – Instant Backdrops
- 7 Smart Lifestyle Photography Backdrop Ideas for Creators – Instant Backdrops
- 7 Creative Examples of Backdrop Setups for Photographers – Instant Backdrops