
Master Food Photography Composition: Expert Guide
TL;DR:
- Good food photos come from intentional composition and suitable surfaces.
- Using proper angles, layers, and backdrops enhances visual storytelling and dish appeal.
- Creative rule-breaking with purpose elevates food photography beyond standard techniques.
You spend an hour styling the perfect bowl of ramen. The steam is rising, the toppings are arranged just right, and the light looks great. Then you check your photo and it feels flat, cluttered, or just… off. This is one of the most common frustrations food photographers face. The good news? Great food photos are not accidental. They come from intentional composition choices and the right surfaces behind your subject. This guide walks you through the exact tools, techniques, and backdrop strategies that turn average shots into scroll-stopping images.
Table of Contents
- Essential tools and materials for perfect food composition
- Step-by-step: Compose your shot like a pro
- Camera angles and backdrop synergy for maximum visual impact
- Creative variations: Breaking rules for showstopping images
- A fresh perspective on food photography composition
- Elevate your food shots with Instant Backdrops
- Frequently asked questions
Key Takeaways
| Point | Details |
|---|---|
| Start with basics | Fundamental techniques like Rule of Thirds lay the groundwork for visually balanced shots. |
| Choose the right tools | High-quality, neutral backdrops paired with sturdy gear elevate your images instantly. |
| Select smart angles | Match your camera angle to the food type and backdrop to highlight character and depth. |
| Break rules with purpose | Intentional rule-breaking and creative variations make your photos stand out. |
Essential tools and materials for perfect food composition
Now that you’re ready to capture more dynamic images, let’s ensure your setup is pro-level with the right tools and surfaces.
Getting your gear right before you shoot saves you time and frustration later. You don’t need every piece of equipment on the market, but a few key items make a real difference in your results.
Essential equipment to have on hand:
- A DSLR or mirrorless camera with a macro or 50mm lens for detail and flattering perspective
- A sturdy tripod for consistent framing across multiple shots
- Tethering tools so you can review images on a larger screen in real time
- Reflectors and diffusers to soften harsh light and fill in shadows
- A selection of neutral props: linen napkins, aged spoons, small bowls
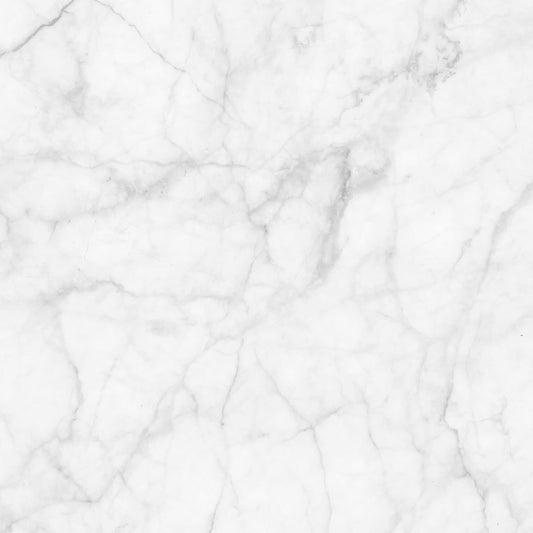
Your backdrop is just as important as your lens. Best food backdrops break down into a few reliable categories. Wood surfaces deliver rustic warmth and texture. Marble and slate bring a modern, cool-toned sophistication. Vinyl offers clean, consistent results that are easy to wipe down after a messy shoot. Linen adds a soft, tactile quality perfect for casual or lifestyle-style flat lays. For maximum flexibility, form an “L” shape using a base surface and a vertical board behind your subject. This creates depth and context without overwhelming the food.
For practical background tips for food photography, matching your backdrop material to the mood of your dish is the first step. A cozy soup wants a worn wood surface. A clean panna cotta calls for cool marble or polished stone. A full backdrop setup guide can help you build your ideal workspace from scratch.
Quick-reference: Backdrops and surfaces compared
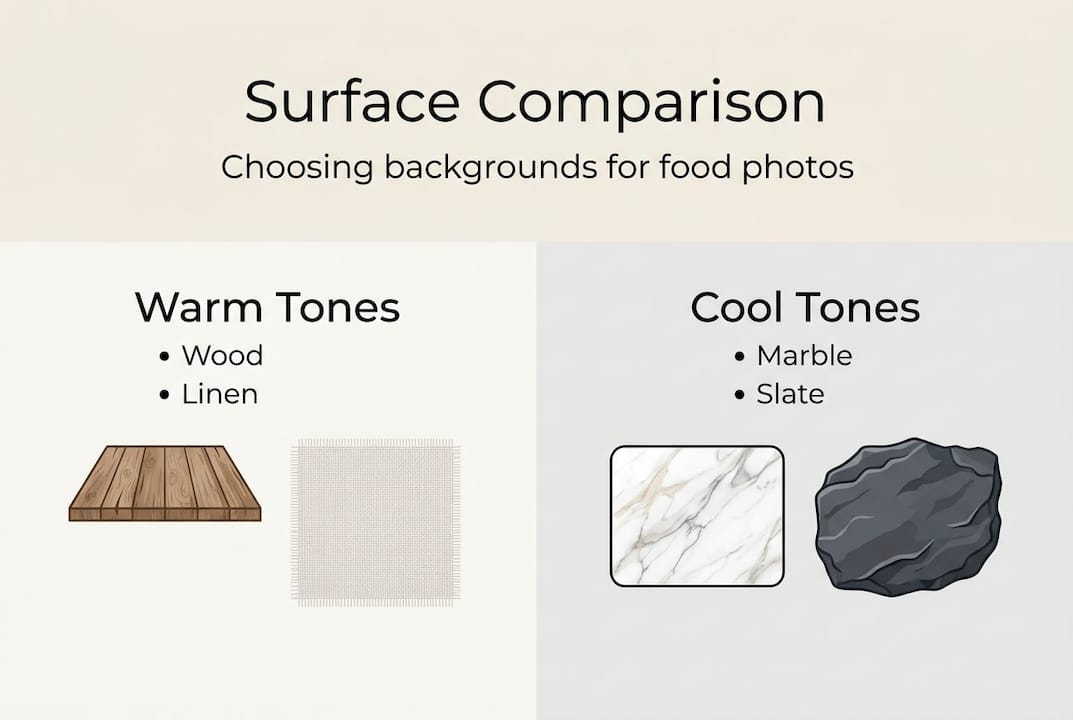
| Surface | Best for | Pros | Cons |
|---|---|---|---|
| Wood | Rustic, warm dishes | Rich texture, natural feel | Can warp with moisture |
| Marble/Slate | Modern, elegant food | Cool tones, timeless look | Heavy, fragile |
| Vinyl | All-purpose shooting | Durable, spill-resistant, portable | Can look artificial if overlit |
| Linen | Soft, lifestyle images | Gentle texture, subtle | Wrinkles easily |
Pro Tip: Stick with neutral, desaturated tones for your backdrops. Neutral desaturated colors enhance food vibrancy by keeping visual attention on the dish, not the surface.
Step-by-step: Compose your shot like a pro
With your tools at the ready, it’s time to design your shot for maximum impact.
Composition is the structure beneath every great food photo. Without it, even the most beautiful dish looks random. Follow these steps to build shots with intention.
- Identify your hero subject. Decide which element of the dish is the star. Everything else in the frame should support it, not compete with it.
- Choose your composition technique. Core composition techniques include the Rule of Thirds, leading lines, negative space, layering, and advanced grids like the Golden Ratio, Golden Triangle, and Dynamic Symmetry. Start simple and build from there.
- Build layers. Work from the background forward. Place your backdrop first, then your surface props, then the dish, then any foreground elements. Each layer adds depth and story.
- Use odd numbers. Groups of three, five, or seven feel visually natural. A plate flanked by two small items looks staged. Add a third and it relaxes into balance.
- Apply a grid. Overlay the Rule of Thirds grid on your camera viewfinder and align your hero food item at one of the four intersection points.
Composition grid comparison:
| Technique | Best use case | Difficulty |
|---|---|---|
| Rule of Thirds | Everyday hero shots | Beginner |
| Golden Ratio | Organic, balanced scenes | Intermediate |
| Dynamic Symmetry | Complex, editorial layouts | Advanced |
Layering is where elevating visual impact really happens. A flat lay without foreground interest reads as a menu photo. Adding a linen napkin edge or a scattered herb in the foreground pulls the viewer into the scene. The backdrop importance cannot be overstated here. A well-chosen surface unifies every layer of the composition.
Pro Tip: Shoot tethered for real-time composition review. Seeing your shot on a larger screen reveals balance issues you’d miss on the camera’s small display.
Camera angles and backdrop synergy for maximum visual impact
After framing your composition, the next creative leap is how you position both camera and backdrop to amplify the food’s best features.
The angle you choose changes everything. It affects how textures read, how tall a dish appears, and how much your backdrop contributes to the overall feel.
The three primary angles:
- Overhead (90°): Perfect for flat lays like pizzas, salads, and grain bowls. This angle shows the full spread and works beautifully with patterned or detailed backdrops.
- 45° angle (three-quarter view): The most versatile option. It shows both the top and the side of a dish, making it ideal for soups, pasta, and hero plate shots. Versatile hero shots at 45° reveal depth that overhead views miss.
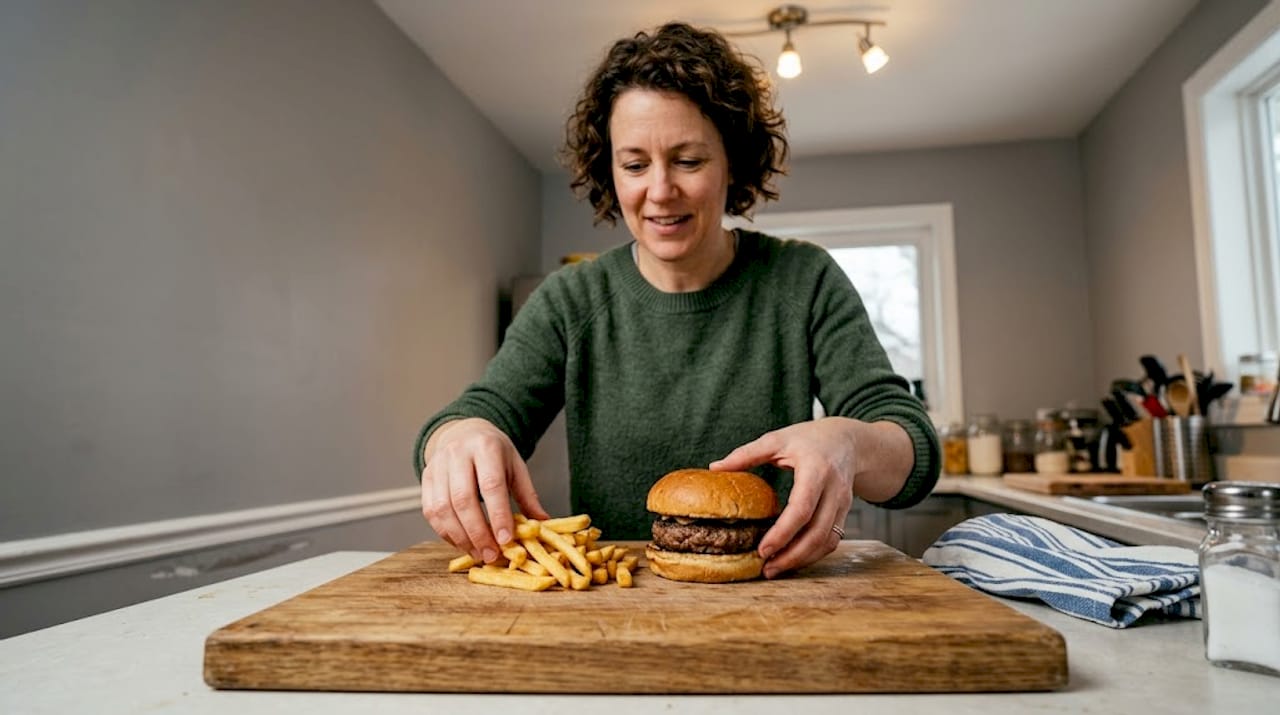
- Straight-on (0°): Reserved for tall, layered foods like burgers, cakes, and stacked sandwiches. This angle shows height and interior layers clearly.
Avoid shooting between 45° and 90° for most dishes. Distorted perspectives at mid-range angles flatten depth without the clean geometry of overhead or the drama of eye-level shots.
Angles matched with dish types and backdrops:
| Camera angle | Best dish types | Suggested backdrop |
|---|---|---|
| Overhead (90°) | Pizza, salads, flat lays | Wood, marble, patterned vinyl |
| 45° three-quarter | Soups, pasta, hero plates | Neutral stone, aged wood |
| Straight-on (0°) | Cakes, burgers, cocktails | Simple muted or dark vinyl |
Surface texture matters as much as color. A rough wood board behind a burger at 0° adds grit and authenticity. A smooth marble surface under a dessert at 45° adds elegance. See creative backdrop examples to explore how different surfaces change a dish’s personality entirely.
Pro Tip: Build an “L” setup using your backdrop panel vertically behind the dish and your surface board flat underneath. This creates a natural corner that gives every angle a cohesive environment. Check out tips on styling with durable backdrops for step-by-step setup guidance.
Creative variations: Breaking rules for showstopping images
You’ve mastered the basics. Now it’s time to push boundaries and elevate your shots with unexpected creativity.
Rules give you a foundation. Breaking them intentionally gives you a signature. The key word is intentionally. Random rule-breaking produces chaos. Purposeful rule-breaking produces art.
Creative techniques to try:
- Diagonals for movement: Place your dish and props along a diagonal line instead of horizontal. This creates visual energy and pulls the eye across the frame.
- Repetition with a break: Arrange a row of identical items and remove one, or tilt one slightly. Repetition with a break creates rhythm and then surprises the viewer, making the image memorable.
- Foreground immersion: Push a prop or ingredient close to the lens so it blurs in the foreground. This gives images a cinematic, immersive quality that standard setups lack.
- Negative space for minimalism: Leave large portions of your backdrop empty around the hero subject. This works beautifully for editorial content where text overlays will be added, and it creates striking, clean visuals on their own.
“Break rules intentionally for creative impact. Use diagonals for movement, repetition for pattern interest, foreground elements for immersion, and negative space for minimalism and text overlays.” Creative composition is about purpose, not accident.
When you step away from the Rule of Thirds, you need something else to anchor the image. That anchor is often your backdrop. A bold marble surface or a deeply grained wood panel provides visual structure even when your subject placement is unconventional. Explore backdrop ideas for pros to find surfaces that hold a composition together even when you’re pushing creative limits.
A fresh perspective on food photography composition
With creative strategies in hand, let’s talk about the artful balance between discipline and daring.
Most composition guides treat the Rule of Thirds like a law. It isn’t. It’s a starting point. The photographers who produce truly memorable food images are not the ones who follow grids most precisely. They’re the ones who understand why those grids work, and then choose when to depart from them.
Here’s something conventional advice rarely says: your backdrop is not background. It is a compositional tool as active as any lens or prop you own. The wrong surface can undermine even perfect technique. The right one can make a simple dish look extraordinary without a single compositional trick.
Don’t chase the “perfect” composition. Chase the composition that tells your dish’s story best. Sometimes that’s a precise Golden Ratio layout. Sometimes it’s a bold diagonal with empty negative space and a dark vinyl surface. The goal is intention, not perfection. Read more about how backgrounds in food photography shape the story you’re telling before you even place the dish.
Elevate your food shots with Instant Backdrops
Ready to put this guide to work in your portfolio? Here’s where you can find pro-grade help fast.
Putting great composition into practice is easier when your surfaces are working with you, not against you. Instant Backdrops offers high-quality backdrops designed specifically for food and product photography. Every surface is durable, spill-resistant, and built to handle real shooting conditions, from saucy pizza shoots to powdery dessert flat lays.
From realistic wood grain to polished marble and muted stone, the range covers every creative vision in this guide. Whether you’re building an L-shaped setup or looking for a clean neutral surface for editorial work, the right backdrop is ready for you. Explore helpful background tips alongside the full product collection to find surfaces that match your style and elevate every shot you take.
Frequently asked questions
What is the single most important composition rule for food photography beginners?
Start with the Rule of Thirds to create balance and draw attention to your main subject. It’s the most accessible core composition technique and the fastest way to see immediate improvement in your images.
Which camera angle makes desserts look their best?
Most desserts shine at a 45° three-quarter angle, which captures both height and surface detail in a single frame. For especially tall layered cakes, a straight-on shot at 0° can also be very effective.
Do I need expensive surfaces for stylish food photos?
Not at all. Vinyl, wood, or linen backdrops in neutral tones make simple setups look polished and professional without a large investment. The key is choosing muted colors that let your food be the star.
How does negative space improve food photos?
Negative space adds visual breathing room and makes the hero dish pop against the backdrop. It’s especially useful for editorial images where text overlays or graphic elements will be added in post-production.
Recommended
- Food Photography Background Tips for Stunning Visuals – Instant Backdrops
- How to style food photography with durable backdrops – Instant Backdrops
- Mastering Food Photography with Your Smartphone: 8 Expert Tips – Instant Backdrops
- Food Backdrop Setup Guide: Elevate Your Food Photography – Instant Backdrops