

Master marble texture photography with vinyl backdrops
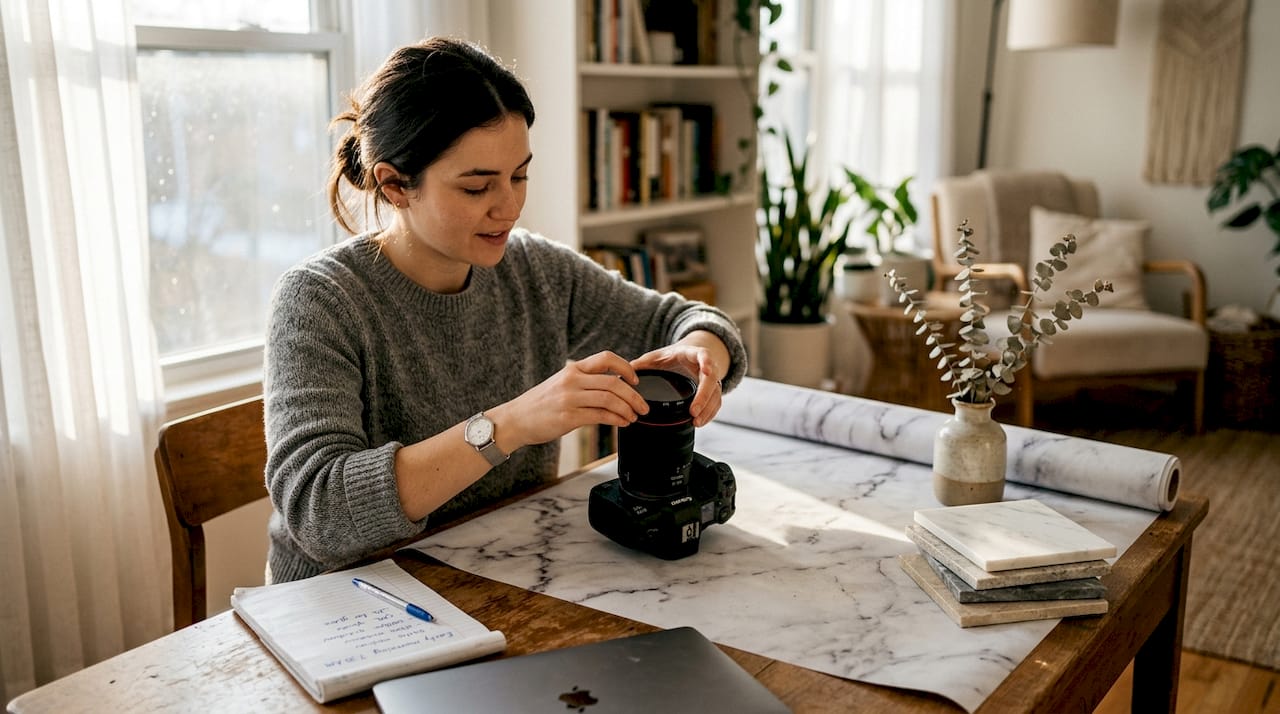
Capturing the intricate veining and depth of marble texture on vinyl backdrops challenges even experienced photographers. Glare, reflections, and flat lighting often obscure the very details that make marble visually compelling. You might assume expensive equipment or genuine marble slabs are necessary, but the truth is simpler. With precise lighting angles, the right camera settings, and quality vinyl backdrops, you can achieve professional marble texture photography that rivals studio work. This guide reveals specialized techniques to control reflections, emphasize veining, and produce sharp, dimensional marble images that elevate your product and lifestyle photography.
Table of Contents
- Key takeaways
- Understanding marble texture and vinyl backdrops
- Optimizing lighting and equipment for marble texture photography
- Creating and using DIY vinyl marble backdrops effectively
- Comparing genuine marble and vinyl backdrops for texture photography
- Explore premium vinyl marble backdrops for professional results
- FAQ
Key Takeaways
| Point | Details |
|---|---|
| Side lighting angle | Position diffused side lighting at forty five degrees to reveal depth and reduce glare. |
| Circular polarizer use | Attach a circular polarizing filter and rotate it to minimize reflections while enhancing vein patterns. |
| Diffusion is essential | Use large softboxes and diffusion panels to soften light and prevent hot spots that wash out texture. |
| Affordable vinyl backdrops | DIY peel and stick vinyl backdrops provide a lightweight, cost effective marble texture option. |
Understanding marble texture and vinyl backdrops
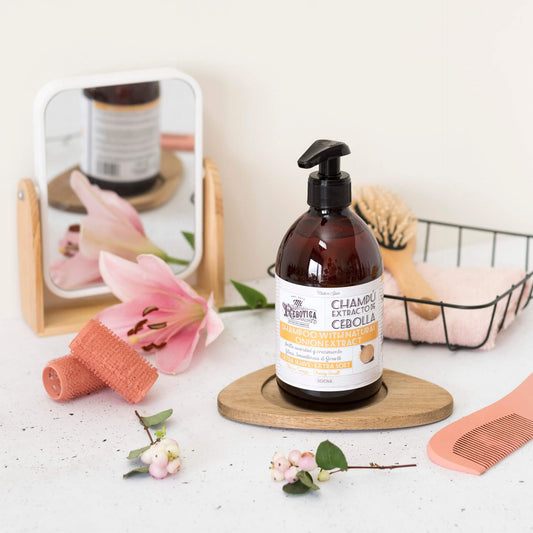
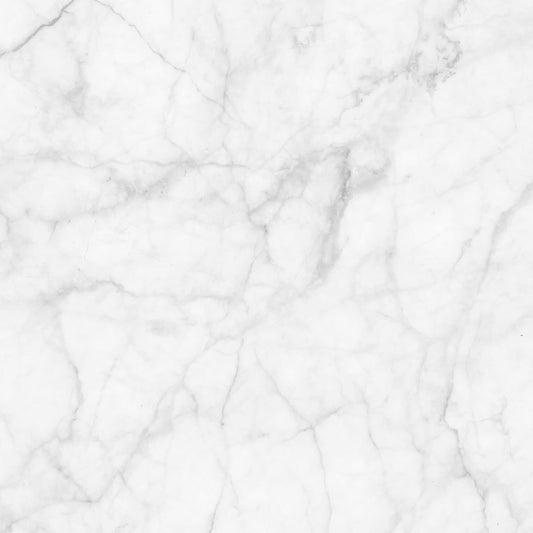
Marble’s polished surface creates a unique photographic challenge. The material combines sharp specular reflections with soft, organic veining that runs beneath the surface. When light hits marble, you get both mirror-like highlights and subtle diffuse scatter that reveals depth. Vinyl backdrops replicate this visual complexity through high-resolution printing and textured finishes, but they introduce their own glare characteristics that differ from genuine stone.
The key to successful marble photography lies in controlling how light interacts with these surfaces. Using 45-degree side-lighting reveals the three-dimensional texture and interplay of specular and diffuse reflections unique to marble. Front lighting flattens the image, erasing the depth that makes marble visually interesting. Side lighting creates shadows within the veins and surface variations, transforming a two-dimensional backdrop into something that appears tactile and real.
Vinyl backdrops offer distinct advantages for marble texture photography:
- Consistent surface quality without natural stone imperfections
- Controlled reflectivity that responds predictably to lighting adjustments
- Lightweight portability for location shoots and easy storage
- Cost-effective alternative to heavy, fragile marble slabs
Understanding these material properties helps you anticipate lighting challenges. Vinyl’s smooth finish can produce more uniform reflections than natural marble, which means you need deliberate diffusion strategies. The printed veining on quality vinyl backdrops mimics marble’s organic patterns, but without the subtle surface height variations of real stone. Your lighting must compensate by creating artificial depth through strategic shadow placement.
“The difference between amateur and professional marble photography often comes down to reflection management. Master that, and you master marble texture.”
This understanding forms the foundation for all technical decisions that follow. You’re not just photographing a flat surface but creating the illusion of depth, weight, and luxury that marble represents.
Optimizing lighting and equipment for marble texture photography
Your lighting setup determines whether marble texture appears flat or dimensional. Positioning diffused side lighting at a 45-degree angle minimizes glare while highlighting marble veining. This angle creates gentle shadows that follow the natural contours of the veining pattern, adding depth without harsh contrast. A single softbox positioned to the left or right of your subject works better than overhead or front lighting for revealing texture.
Diffusion is non-negotiable for marble photography. Hard light sources create hot spots that blow out highlights and obscure detail. Use these diffusion methods:
- Large softboxes (24x36 inches minimum) for even, wrap-around light
- Diffusion panels placed between your light source and backdrop
- Bounce cards to fill shadows without introducing secondary reflections
- White umbrella modifiers for broader, softer light spread
Circular polarizing filters reduce glare from polished surfaces and emphasize vein patterns. Attach a CPL filter to your lens and rotate it while viewing through your camera. You’ll see reflections intensify and diminish as you turn the filter. Find the rotation angle that eliminates distracting glare while preserving the marble’s natural sheen. This dynamic control lets you adapt to different backdrop finishes and lighting conditions without moving your lights.
Camera stability matters as much as lighting. A sturdy tripod eliminates camera shake, allowing you to use lower ISO settings and narrower apertures for maximum sharpness. This stability becomes critical when shooting close-ups where even tiny movements blur fine veining details.
Recommended camera settings for marble texture photography:
- ISO: 100-200 for noise-free images with maximum detail retention
- Aperture: f/2.8 for shallow depth with soft backgrounds, f/8-f/11 for full sharpness across the frame
- Shutter speed: 1/125s or faster to freeze any movement, slower if using tripod
- White balance: Custom setting based on your specific lighting to ensure accurate marble color
These settings work together to capture the subtle tonal variations that make marble texture believable. Higher ISO introduces noise that competes with fine veining. Wide-open apertures can miss focus on textured surfaces. Slow shutter speeds without stabilization create motion blur that destroys sharpness.
Pro Tip: Bracket your exposures by shooting at -1, 0, and +1 stops. Marble’s high contrast between dark veins and light background often exceeds your camera’s dynamic range. Bracketing gives you options in post-processing to recover both highlight and shadow detail.
“Think of your polarizing filter as a dimmer switch for reflections. Small rotations make huge differences in how marble texture reads in your final image.”
Test your setup before the actual shoot. Place a small object on your backdrop and photograph it with different lighting angles and filter rotations. Review the images at 100% magnification to verify sharpness and texture clarity. This testing reveals problems when you still have time to adjust, rather than discovering issues after your subject has left.
The benefits of vinyl backdrops become apparent when you master these lighting techniques. Vinyl’s consistent surface responds predictably to your lighting adjustments, unlike natural marble which can have unpredictable reflectivity variations. This consistency speeds up your workflow and ensures repeatable results across multiple shoots.
For detailed setup guidance, explore our photography backdrop setup guide to optimize your studio configuration for texture-focused work.
Creating and using DIY vinyl marble backdrops effectively
Building your own vinyl marble backdrop costs less than $25 and takes under an hour. DIY vinyl marble backdrops using peel-and-stick shelf liner on plywood provide realistic texture for photographers on tight budgets. This approach gives you complete control over size, portability, and storage while delivering professional-looking results.
Materials needed for a DIY vinyl marble backdrop:
- Peel-and-stick marble-patterned shelf liner (available at home improvement stores)
- Thin plywood panel, 24x24 inches or larger depending on your shooting needs
- Squeegee or credit card for smoothing application
- Utility knife for trimming excess material
- Cleaning cloth and isopropyl alcohol for surface preparation
Follow these steps to create your backdrop:
- Prepare the plywood surface by sanding any rough spots and wiping clean with isopropyl alcohol to remove dust and oils that prevent adhesion.
- Measure and cut your shelf liner slightly larger than the plywood panel to allow for trimming after application.
- Peel back 2-3 inches of the backing paper and align the liner with one edge of the plywood.
- Slowly peel away more backing while using your squeegee to smooth the liner onto the plywood, working from center outward to eliminate air bubbles.
- Trim excess liner along the edges using a utility knife and straightedge for clean, professional-looking borders.
- Wipe the finished surface with a microfiber cloth to remove fingerprints and ensure the marble pattern appears crisp.
Benefits of DIY vinyl marble backdrops include lightweight construction for easy transport, simple storage that requires minimal space, and realistic veining patterns that photograph well under proper lighting. The peel-and-stick application means you can replace worn backdrops quickly or swap patterns for different marble styles.
Pro Tip: Create multiple backdrop panels in different marble patterns (Carrara, Calacatta, Statuario) to expand your creative options. Store them vertically in a closet or behind furniture to prevent warping.
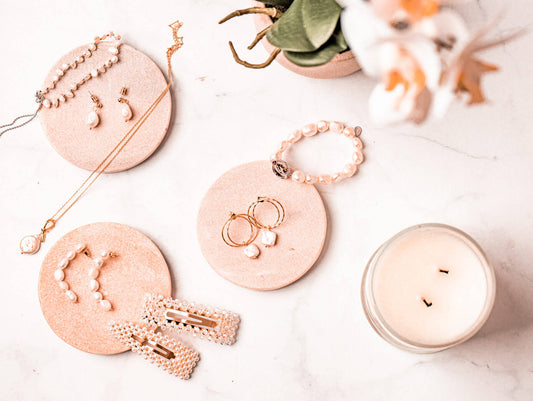
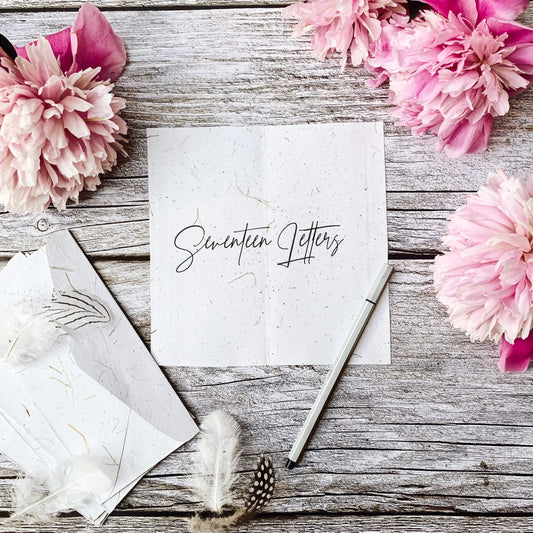
Proper backdrop setup prevents wrinkles and maintains flatness for accurate texture capture. Place your DIY backdrop on a stable surface or lean it against a wall at a slight angle. For flat lay photography, ensure the surface underneath provides firm support without flex that creates shadows. Avoid direct sunlight on vinyl backdrops, as heat can cause temporary warping that affects image quality.
| Backdrop Size | Best Use Case | Storage Method |
|---|---|---|
| 12x12 inches | Jewelry, small products | Drawer or shelf |
| 24x24 inches | Food, medium products | Vertical lean storage |
| 36x48 inches | Fashion flatlays, large products | Behind door or in closet |
DIY backdrops work best for controlled studio environments where you can manage lighting precisely. Their smooth vinyl surface responds well to the 45-degree side lighting technique, creating convincing marble texture when photographed with proper diffusion. The cost savings let you experiment with different shooting angles and lighting setups without worrying about damaging expensive equipment.
For photographers seeking premium alternatives to DIY solutions, pre-made options like the Carrara marble backdrop offer superior print quality and larger sizes. Professional vinyl backdrops feature higher resolution printing and more durable materials that withstand frequent use.
Explore our DIY photography backdrop workflow for additional tips on integrating homemade backdrops into your studio setup efficiently.
Comparing genuine marble and vinyl backdrops for texture photography
Choosing between genuine marble slabs and vinyl backdrops involves weighing photographic quality against practical considerations. Each option offers distinct advantages depending on your shooting requirements, budget, and physical workspace limitations.
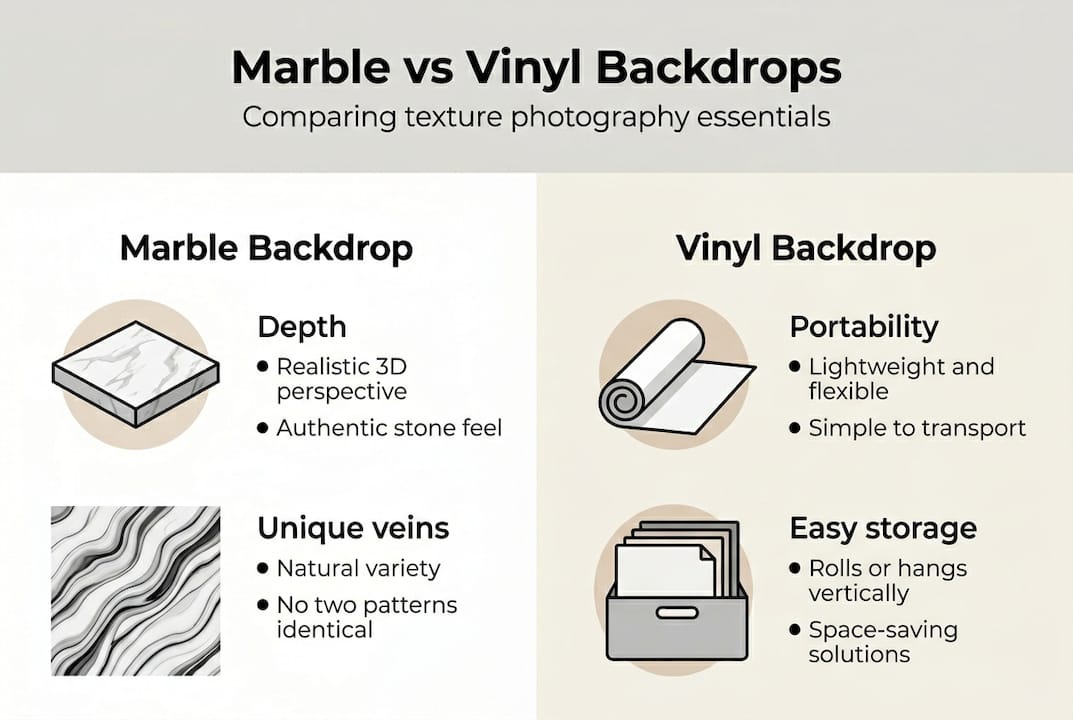
Genuine marble delivers unmatched natural depth and texture variation. Every slab features unique veining patterns, color gradations, and surface characteristics that create authenticity in close-up photography. The three-dimensional quality of real stone catches light in ways that printed surfaces cannot fully replicate. However, marble slabs are heavy (a 24x24 inch piece weighs 15-20 pounds), expensive ($50-200 per slab), and fragile. Transportation risks chipping, and storage requires significant space.
Vinyl backdrops provide lightweight portability, affordability, and easier management while delivering realistic veining through high-quality printing. Modern vinyl backdrops use high-resolution photography of real marble, capturing veining details that read convincingly in final images. A vinyl backdrop weighing less than two pounds can roll up for storage and costs $30-80 depending on size and quality.
Lighting management differs significantly between materials:
- Genuine marble’s reflectivity varies across the surface due to natural polishing inconsistencies
- Vinyl backdrops offer uniform reflectivity that responds predictably to lighting adjustments
- Real marble may require additional fill lighting to balance uneven surface characteristics
- Vinyl requires careful polarizer use to control its consistent sheen
| Feature | Genuine Marble | Vinyl Backdrop |
|---|---|---|
| Weight (24x24") | 15-20 lbs | Under 2 lbs |
| Cost | $50-200 | $30-80 |
| Portability | Poor | Excellent |
| Texture authenticity | Highest | Very high |
| Durability | Chips/cracks | Stain-resistant |
| Storage | Requires space | Rolls/folds |
Portability and storage strongly favor vinyl for photographers who shoot on location or have limited studio space. You can transport multiple vinyl backdrops in a single bag, while moving genuine marble requires careful padding and heavy-duty cases. Studio photographers with permanent setups may prefer genuine marble for specific high-end product photography where absolute authenticity matters.
Pro Tip: Use genuine marble for hero shots and lifestyle scenes where the backdrop appears prominently, then switch to vinyl for high-volume product photography where consistency and speed matter more than absolute authenticity.
Studio realism considerations depend on your final image use. E-commerce product photography rarely requires genuine marble since proper lighting makes quality vinyl indistinguishable in web-sized images. Editorial and advertising work with large print formats may benefit from real marble’s subtle depth cues that survive extreme magnification.
For photographers exploring different aesthetic options, reviewing examples of backdrop styles helps identify which marble patterns suit specific product categories and brand aesthetics.
Premium vinyl options like the Statuario marble backdrop bridge the gap between DIY solutions and genuine stone, offering professional-grade printing and durability at accessible price points.
Explore premium vinyl marble backdrops for professional results
Mastering marble texture photography requires more than technique. The quality of your backdrop directly affects your final image sharpness, color accuracy, and professional presentation. While DIY solutions work for learning and experimentation, serious photographers eventually need backdrops that deliver consistent, repeatable results across hundreds of shoots.
Instant Backdrops specializes in vinyl marble backdrops engineered specifically for professional photography. These backdrops feature waterproof, stain-resistant surfaces that withstand spills and frequent cleaning without degrading print quality. The lightweight construction makes setup effortless, while the large format sizes accommodate everything from jewelry close-ups to full fashion flatlays. Each backdrop uses high-resolution printing that captures marble’s subtle color variations and veining patterns, responding beautifully to the 45-degree lighting and polarizer techniques covered in this guide. Explore the full collection at Instant Backdrops to find marble patterns that match your brand aesthetic. Popular options include the classic Carrara marble backdrop for bright, airy product shots and the dramatic Statuario marble backdrop for luxury goods and high-end lifestyle photography.
FAQ
What is the best lighting angle for photographing marble textures?
Position diffused lighting at 45 degrees to the backdrop surface to reveal veining depth while controlling reflections. This angle creates shadows that follow the marble’s natural patterns, adding three-dimensional quality. Flat, front-facing light eliminates depth perception and makes marble appear lifeless. Side lighting emphasizes texture variation and surface character that defines quality marble photography.
How do polarizing filters improve marble photography?
Circular polarizing filters decrease unwanted glare and allow marble veins to appear clearer in your final images. Rotating the filter adjusts reflection control dynamically during shooting, letting you find the perfect balance between eliminating distracting highlights and preserving the marble’s natural sheen. Without a polarizer, shiny marble surfaces often create hot spots that obscure fine detail and reduce overall image quality.
What camera settings work best for marble texture photography?
Use ISO 100-200 for noise-free images and set aperture between f/2.8 and f/11 depending on your depth of field needs. Lower ISO values preserve fine detail in marble veining, while the aperture range balances sharpness with creative control. A tripod stabilizes your camera for sharp focus, especially critical in close-up marble shots where even slight movement creates blur. Shutter speeds of 1/125s or faster prevent motion blur when shooting handheld.
Can I create a realistic marble backdrop at home on a budget?
Yes, peel-and-stick vinyl on plywood creates realistic, lightweight backdrops for under $25. This DIY approach gives you professional-looking marble texture without heavy investment in genuine stone or premium backdrops. The vinyl shelf liner available at home improvement stores features convincing marble patterns that photograph well under proper lighting. DIY backdrops work perfectly for photographers building their skills or testing different marble styles before investing in larger professional options.